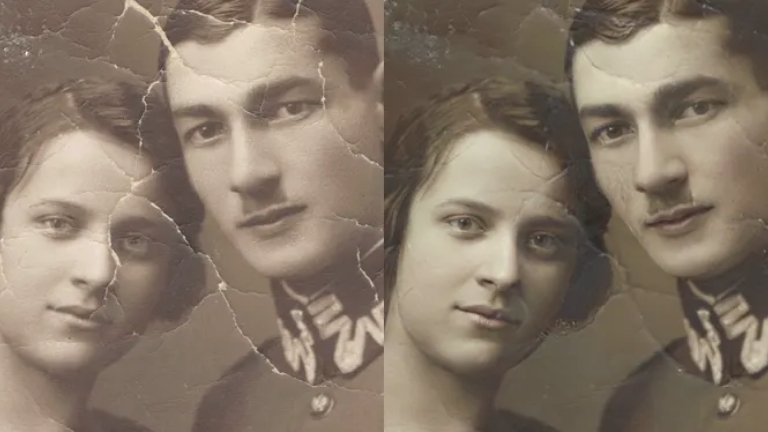
Old photographs have a charm that is hard to resist. They capture memories and moments from the past that are cherished by generations to come. However, as time passes, these photographs can fade, lose color, and get damaged. Restoring old pictures is not only a way to preserve memories but also a way to honor the past. Thanks to technology, restoring old pictures is now easier than ever before. In this article, we will explore how to restore old pictures online.
Assess the Damage
Before you begin the restoration process, it’s essential to assess the damage. Understanding the extent of the damage will help you determine how to proceed with the restoration process. Here are some common issues you might encounter:
Fading
Fading is a common issue with old photographs. Over time, the colors can become washed out and lose their vibrancy.
Scratches and Tears
Scratches and tears are other common issues with old photographs. These damages can be caused by mishandling, storage, or simply from being in contact with other objects for an extended period.
Stains
Stains are often found on old photographs due to improper storage or exposure to moisture. These can be challenging to remove and may require advanced restoration techniques.
Tools Needed
Before you start restoring your old photos online, you will need the following tools:
Scanner
A scanner is essential for digitizing your old photos. Make sure you use a scanner with a high resolution for better-quality images.
Image Editing Software
You will need image editing software to edit and restore your scanned images. Adobe Photoshop is the most popular choice, but there are many other options available online.
Steps to Restore Old Pictures Online
Now that you have assessed the damage and gathered the necessary tools, let’s explore the steps to restore old pictures online.
Step 1: Scan Your Old Photographs
The first step in restoring old pictures online is to scan your old photographs. Place your photographs on the scanner and scan them at a high resolution. Save the scanned images in a digital format, such as JPEG or TIFF.
Step 2: Open the Scanned Images in the Image Editing Software
Open your scanned images in the image editing software of your choice. You can use Adobe Photoshop, GIMP, or any other image editing software you prefer.
Step 3: Fix the Exposure and Color Balance
Once you have opened the scanned images in the image editing software, the first thing you should do is fix the exposure and color balance. Adjust the brightness, contrast, and color balance to restore the vibrancy of the colors.
Step 4: Remove Scratches and Tears
Next, use the clone stamp tool or healing brush tool to remove scratches and tears from the scanned images. Zoom in to the damaged areas to ensure accuracy.
Step 5: Remove Stains
If there are stains on your scanned images, you can remove them using the clone stamp tool or the spot healing brush tool. However, if the stains are severe, you may need to use advanced restoration techniques.
Step 6: Sharpen the Images
Finally, sharpen the images to improve their overall quality. Use the sharpening tool in your image editing software to enhance the details and make the images appear crisp and clear.
Conclusion
Restoring old pictures online is an excellent way to preserve memories and honor the past. With the right tools and techniques, you can bring old photographs back to life and relive precious moments from the past. Remember to assess the damage, use a high-quality scanner, and choose the right image editing software to ensure the best results.


